
TL;DR: Vermicomposting uses red wigglers (Eisenia fetida) to convert food scraps into nutrient-dense castings in 2–3 months. It’s indoor-viable, produces premium fertilizer, and handles most kitchen scraps. Key variables: moisture, temperature, pH, and feeding rate. Get those right and the system runs itself.
Vermicomposting Worm Bin Setup: A Practical Guide That Actually Works
Worm bins fail for predictable reasons — too wet, too hot, wrong species, overfeeding. Most beginner guides skim those details and then act surprised when readers report dead worms or a stinking bin. This guide doesn’t do that. We cover the biology, the build, and the failure modes in enough detail that you can diagnose problems before they kill your colony.
Vermicomposting is genuinely one of the highest-yield composting methods available to apartment dwellers. A healthy 1-square-foot bin processes roughly 0.5kg of food scraps per week and produces castings worth $15–40/kg at garden centers. You’re essentially running a slow-motion nutrient factory under your kitchen sink.
- Species Selection: Only One Choice That Matters
- Bin Options: DIY vs. Commercial
- Bedding: The Foundation Most Guides Underdress
- What to Feed (and Not Feed)
- Temperature, Moisture, pH: The Control Variables
- Feeding Rate: The Most Important Variable
- Harvesting Castings
- Top Picks at a Glance
- Troubleshooting Common Problems
- FAQ
Species Selection: Only One Choice That Matters
Use Eisenia fetida (red wigglers) or Eisenia andrei. These are epigeic worms — surface dwellers that thrive in decaying organic matter. Do not use earthworms (nightcrawlers) dug from your garden. Nightcrawlers are endogeic: they burrow into mineral soil and will escape a bin or die trying. Every worm bin failure caused by “the worms escaped” involves the wrong species.
Starting quantity: 0.5kg (roughly 500–1,000 worms) per pound of weekly food scraps. A typical household producing 1–2kg of scraps/week needs 1–2kg of worms. Worms reproduce quickly — a healthy bin doubles population in 60–90 days — so starting with 0.5kg and underfeeding initially is fine.
Bin Options: DIY vs. Commercial
| Type | Cost | Pros | Cons |
|---|---|---|---|
| Single tote (14-gal) | $8–15 | Cheap, easy to find | Requires harvesting by hand |
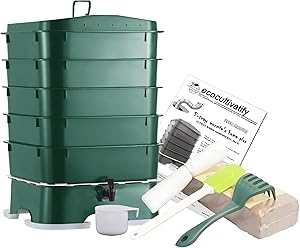
| Stacked tray system | $60–150 | Easy migration harvest | More expensive upfront |
| Flow-through (CFT) | $120–300+ | Best for large volumes | Complex, overkill for household |
For most beginners, a single opaque 14-gallon storage tote with drilled aeration holes works perfectly. Drill 1/4-inch holes on the sides (not the bottom — you want drainage but not a constant drip) and on the lid. Place on a tray to catch leachate. Total cost under $20.
Bedding: The Foundation Most Guides Underdress
Bedding is not optional decoration — it’s the worms’ living environment. It provides carbon balance, moisture regulation, and physical structure. Skimping on bedding is the second most common beginner mistake (overfeeding is first).
Good bedding materials: shredded corrugated cardboard (soak and wring out), torn newspaper (non-glossy), coco coir, aged leaf litter, shredded paper bags. Fill 2/3 of the bin with moistened bedding before adding worms. The squeeze test: grab a handful and squeeze — it should release 1–2 drops of water, not a stream. Wetter than that causes anaerobic conditions and odor. Drier and the worms desiccate.
What to Feed (and Not Feed)
| Feed regularly | Feed sparingly | Avoid entirely |
|---|---|---|
| Fruit scraps, vegetable peels | Coffee grounds (<20% of diet) | Meat, fish, dairy |
| Crushed eggshells (pH buffer) | Citrus peels (high acidity) | Oily/greasy foods |
| Tea leaves, used tea bags | Onion, garlic | Salty foods |
| Soaked cardboard | Spicy foods | Pet waste |
Coffee grounds deserve special mention: worms love them but grounds are acidic and compact into a dense, low-oxygen mat if over-applied. Keep grounds under 20% of feeding volume. Eggshells counteract acidity and provide grit for worm digestion — add crushed eggshells with every feeding.
Temperature, Moisture, pH: The Control Variables
Temperature: Red wigglers are most active at 15–25°C (60–77°F). Below 10°C activity drops sharply; below 5°C mortality begins. Above 35°C causes heat stress and die-off. Keep the bin indoors, away from heating vents and direct sun.
Moisture: Target 70–80% moisture content (the “wrung sponge” consistency). Too wet = anaerobic, sour smell, worm escape attempts. Too dry = slow processing, worm clustering near whatever moisture exists. Add dry shredded cardboard to absorb excess moisture; mist with water if too dry.
pH: Worms prefer 6.5–7.5. Overfeeding acidic materials (citrus, coffee, tomatoes) drops pH and causes worm escape or death. Crushed eggshells and garden lime (sparingly) buffer acidity. If worms are clustering at the lid or sides, pH imbalance or temperature is usually the cause.
Feeding Rate: The Most Important Variable
Overfeeding is the number-one beginner mistake. Start by feeding half what you think is appropriate. Worms process food slowly at first while establishing their microbial community. Add new food only when previous additions are 50–75% processed.
Bury food scraps in different sections of the bin rather than piling in one spot. This distributes microbial activity, reduces local anaerobic conditions, and makes it easier to track what’s been processed. Keep a simple rotation: divide the bin into four quadrants, rotate feeding locations weekly.
Harvesting Castings
Harvest when the bin is mostly dark, earthy-smelling castings with minimal recognizable food scraps — typically every 2–3 months. Two methods:
- Light separation: Dump bin contents into a pile under a bright light. Worms flee from light; scrape off the outer layer every 15–20 minutes until only worms remain in the center. Time-consuming but thorough.
- Migration method (stacked trays): Add fresh bedding and food to a new upper tray. Worms migrate up over 4–8 weeks; harvest the bottom tray when empty of worms.
Finished castings look like dark, crumbly coffee grounds. No food particles visible, earthy smell (not sour). Use as top-dressing for houseplants, mix into potting soil (up to 20%), or brew into worm casting tea for liquid fertilizer. Far more nutrient-dense than standard best electric composter kitchen for plant applications.
Top Picks at a Glance
Worm bin supplies aren’t in our current affiliate catalog, but these zero-waste kitchen essentials reduce the volume and improve the quality of what goes into your bin:
Troubleshooting Common Problems
| Symptom | Likely cause | Fix |
|---|---|---|
| Worms escaping | pH too low, too wet, too hot, or new bin shock | Check all variables; add eggshells; reduce feeding |
| Bad odor | Overfeeding, too wet, wrong food | Add dry bedding, reduce feeding, remove problem foods |
| Worms clustering in corners | pH or temperature stress | Check pH with strips; move bin away from heat sources |
| Fruit flies | Exposed food scraps | Bury all food; add thick layer of bedding on top |
| Slow processing | Too cold, too dry, or underfeeding | Warm location; check moisture; increase feeding gradually |
Fruit flies deserve a separate note: they’re a nuisance but not dangerous to the bin. The fix is consistent burial of food scraps under bedding, not chemical treatment. A thin layer of coco coir on top eliminates 90% of fruit fly issues.
For a complete low-waste kitchen ecosystem, pair your worm bin with our learn about zero waste kitchen essentials and our beeswax wraps bee wraps review to reduce what enters the waste stream in the first place.
FAQ
How many worms do I need to start?
Match worm weight to weekly food scrap weight: 0.5kg of worms per 0.5kg of weekly scraps. Most beginners start with 0.5–1kg (roughly 500–1,000 worms) and underfeed the first month while the colony establishes. Worms double population every 60–90 days in good conditions, so don’t over-invest in your starting colony.
Do worm bins smell bad?
A healthy worm bin smells like fresh earth — the same smell as soil after rain. Bad odors indicate a problem: anaerobic conditions from overfeeding or excess moisture, wrong food types, or pH imbalance. Fix the cause and the smell resolves within days. Properly managed bins are genuinely suitable for indoor use.
Can I add worm castings to houseplants directly?
Yes — castings are mild enough that “hot burning” isn’t a significant risk the way it is with nitrogen-heavy synthetic fertilizers. Use as top-dressing (1–2cm layer on soil surface) or mix into potting soil at up to 20% by volume. Worm casting tea (castings steeped in water, aerated) is even gentler and works well for regular liquid feeding.
What do I do with the bin when I go on vacation?
Worm bins can be left unattended for 2–4 weeks. Before leaving: add a large feeding, add extra bedding, and ensure proper moisture. The colony will slow down without fresh food but won’t die. For trips over a month, ask someone to add a small feeding at the 3-week mark.
Can I vermicompost in winter?
Indoors at room temperature, yes — no seasonal adjustment needed. If your bin is in an unheated garage or outdoor shed, activity will slow or stop below 10°C. Bring it inside or insulate with newspaper/cardboard layers during cold months. Never let the bin freeze.


